
In our latest applications insight, we’re focusing on the fundamentals of hydrostatic head testing.
What’s covered:
- What is Hydrostatic head
- Why is it important
- Standards
- How to perform a hydrostatic head test
- When is a drop 'a drop'?
- Interpreting the results
What is hydrostatic head?
Hydrostatic head is the measurement used to calculate how much water pressure a waterproof material can withstand before water penetration occurs. The test is performed to determine the resistance a fabric or textile has to water being forced through it.
During testing, the specimen is subjected to increasing water pressure from the underside (measured in kilopascales or kPa), under standard conditions, until a pre-determined pressure, which is stated in the fabrics specification, is obtained, or until penetration.
The pressure of the water is monitored by a water-filled manometer which measures the pressure on the specimen in cm or millibar of water.
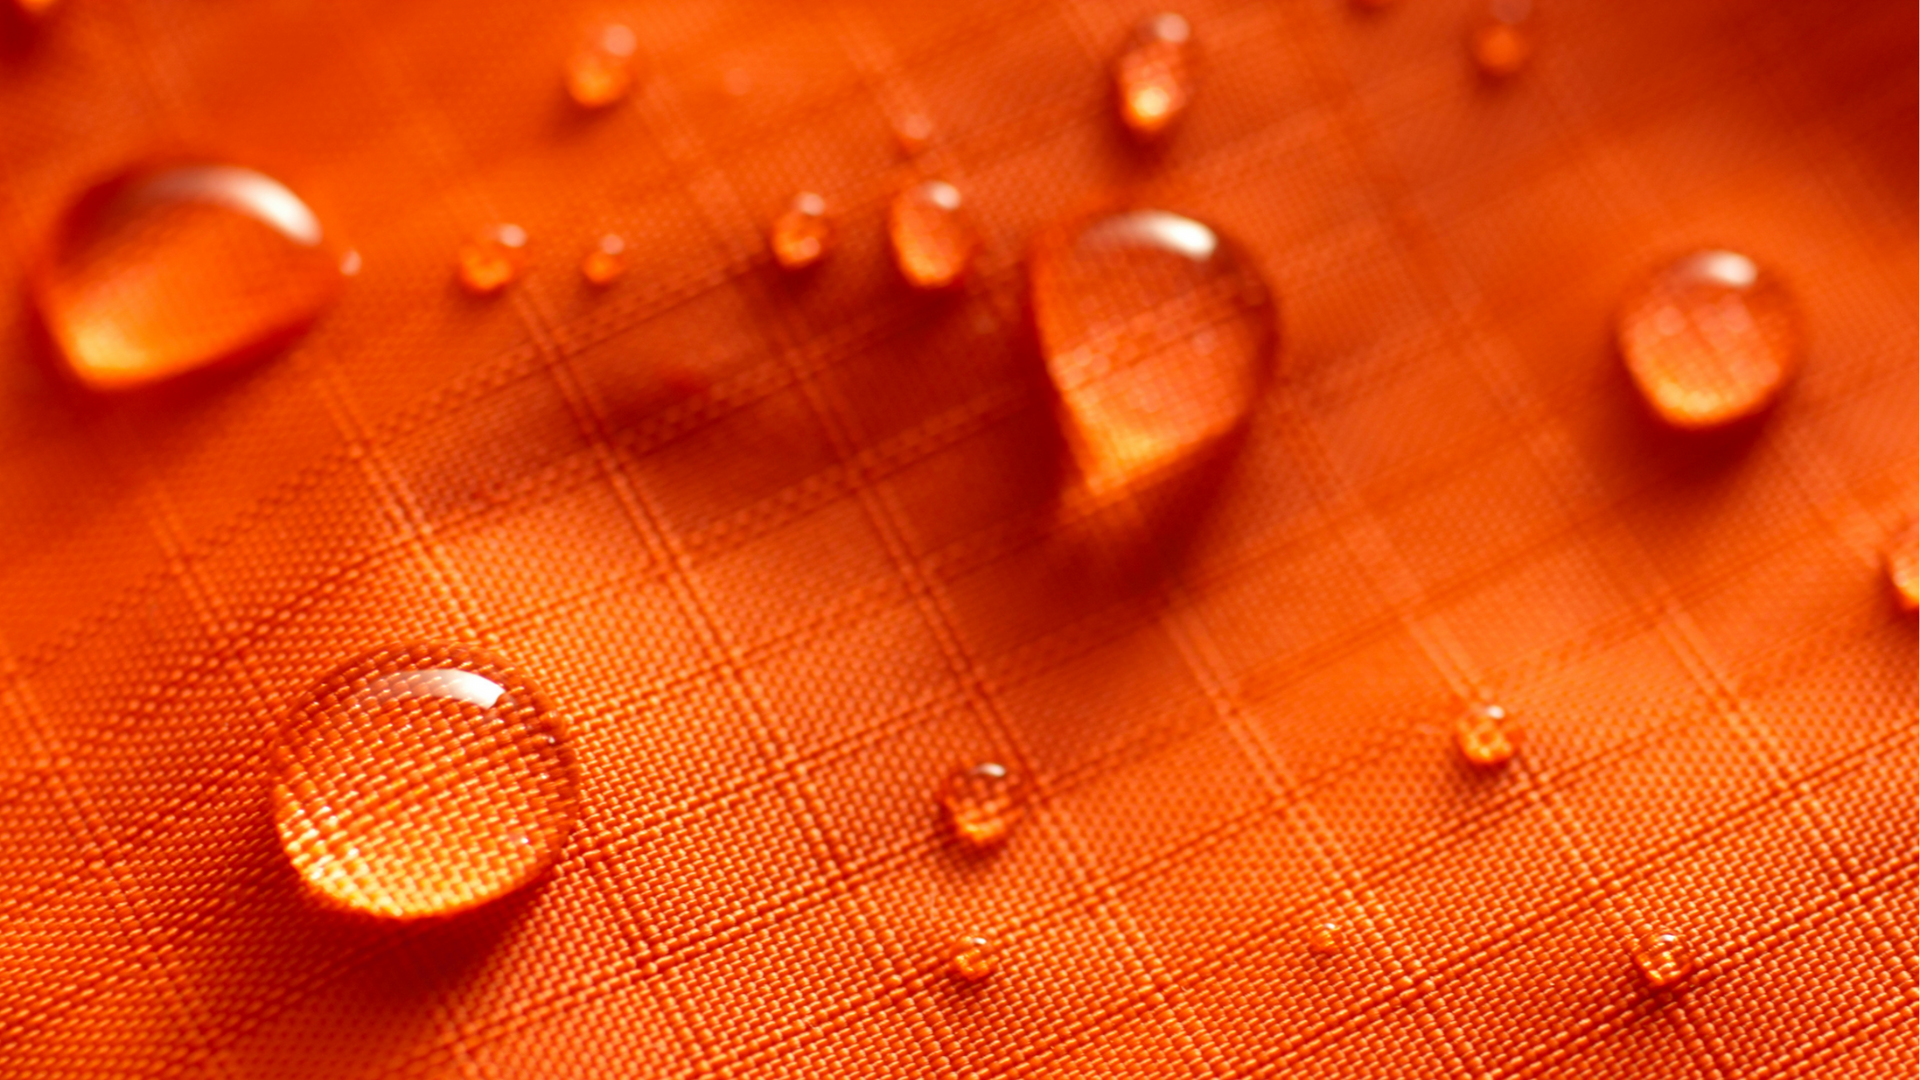
- Lisa Keeling, Technical Specialist“When the pressure increases, the specimen distends. For most standards, the test is measured by potential droplets that form on the face of the fabric.”
As pressure increases, the specimen will distend. What we look for when testing textiles for their hydrostatic head value, is any droplets of water that may form on the surface of the tested specimen, or equally if no penetration of water has occurred.
Hydrostatic head is different to 'water resistant' and 'waterproof'.
It is important to know that testing for the hydrostatic head value is very different to other types of testing such as water repellency.
Hydrostatic head is testing specifically the time until penetration of water, when exposed to increasing water pressure. This brings more focus on the construction to the membrane of the fabric and its resistance to water pressure, and less to the outer layers or finishes a textile might have to aid its repellency to water.
So though the two are linked, they are not the same.

Why is hydrostatic head important?
Hydrostatic head is important because it determines the resistance of fabrics to penetration by water.
Measuring the resistance of water through a textile or fabric can be critically important for many reasons.
An example of where hydrostatic pressure is important is testing the groundsheet of a tent. The groundsheet needs a high level of resistance to water penetration, as it is likely to be exposed to saturated ground. When pressure is applied to the groundsheet by people standing, sitting or sleeping on it, water could be forced through. A poor hydrostatic head value would mean that anything in contact with the inside of the tent would become wet.
This is the most illustrative example of a product to help understand the reasons test for hydrostatic head, though there are many groups of textiles where this test is important.
Performance textiles is one such example of a important group to test for hydrostatic head.
- Lisa Keeling, Technical Specialist“Hydrostatic head testing is key to understanding the performance of a garment in adverse weather conditions, which relates directly to the wearers comfort, and more importantly their safety.”
Collectively performance textiles usually have several features, and most of them overlap with one another, for example the breathability of a raincoat is directly related to its resistance to penetration to water, otherwise known as hydrostatic head.
Outdoor wear and related textile accessories/equipment need to be tested to prove the efficacy of their different functions, for example pilling and snagging strength or abrasion resistance under wet conditions, and from each test it builds up a picture of how the garment or product performs.
Performance textiles such as outdoor wear need a high hydrostatic head value.
A performance garment claiming waterproof properties would need to demonstrate a high level of resistance to hydrostatic pressure to demonstrate its defence capabilities against wind, rain and other physical factors.
Hydrostatic head testing is key to understanding the performance of a garment in adverse weather conditions, which relates directly to the wearer's comfort, and more importantly their safety.
In performance wear particularly, a good hydrostatic head value would keep the wearer from becoming wet in potentially harsh and cold climates, and therefore the wearer will stay warmer, drier, and safer overall in their clothing.

Industry applications cover many areas, ranging from performance wear to medical textiles, tenting and geo-textiles, through to even structural/building textiles.
Any textile that is exposed to water, and specifically water combined with pressure, needs to be tested to determine its hydrostatic head value. An example of a structural/building textile that should be tested would be the roof of the O2 stadium (pictured) in London, which is a type of ETFE ‘weather resistant’ building plastic, which needs to have a high hydrostatic head value as it provides shelter and safety.
Standards
There are several standards, which differ dependent on whether the fabric is a woven or a nonwoven.
Woven
- EN ISO 811
- JIS L 1092
- AATCC 208* + AATCC 127
- F/Z T 01004
- G/B T 4744
Nonwoven
- NWSP 080.6R0
- EN ISO 9073-16
- ISO 1420
- BS EN ISO 811:2018
We did a run through of the EN ISO 811 standard method, which is laid out in 6 steps below, but first here is the equipment that is required.
Your tester needs a sealed head to clamp the specimen into place and a button for identifying if/when a water drop is formed. This is standard to any hydrostatic head tester.
- Air compressor
You also need an air compressor, depending on the type of hydrostatic head tester you are using. For James Heal we need an air compressor as our HydroView is a pneumatic instrument.
The instrument needs a high level of pressure to be able to apply gradually to the specimens that are being tested, as some textiles will perform better than others and may need much higher pressures to gain results. Using an air compressor means that you can have a regulated level of pressure which is easy to adjust and gives you much more accurate data.
- Freshly distilled water
In the standard that we are focusing on today, it is recommended that a grade 3 freshly distilled water is used (the standard we are using states that this grade of water is to match that in ISO 3696, hence the reason for grade 3 being required).
The temperature of the water also needs to be taken into account, as higher temperatures have been known to yield lower values of hydrostatic head. The specific temperature in this standard is 20C -+2, or 27C -+2, which you use is dependent on the climatic conditions of the end use of the product, and should be pre-determined with the customer before testing.

How to perform a test
The exact steps may vary for the differing instrument manufacturers but this is the outline of the ISO 811 method using James Heal’s HydroView.
Before the test begins, the standard we are using specifies that there needs to be one of two acceptable rates of increasing water pressure, and one of two acceptable temperatures for the test.
The pressure can increase in either 10cm per minute, or 60cm per minute, and the temperature should be either 20C or 27C.
The temperature you chose will be down to the end use of the specimen, and the climatic conditions it is to be used in. For example in products aimed at UK customers let's say a raincoat, the temperature you choose will be 20C, as the UK does not have tropical weather.
The pressure like the temperature, is to be agreed upon beforehand with the textile manufacturer, as some fabrics have a higher level of water resistance than others, but it should be discussed beforehand to ensure the most appropriate rate of pressure increase is used.
Select your standard/ set your parameters
Select the standard from the pre-loaded standards library, or set your own parameters. These parameters are the temperature and rate of pressure, so follow the specifications in the method you have chosen to use, according to the type of fabric you are testing.
For James Heal all the standards are pre-loaded in the TestWise software, but also you can enter your own parameters manually.

Set water level
Ensure firstly that the corresponding test head is inserted according to the standard you are using, then adjust the water level to the tolerances that complies with that standard.
Setting the water level is either a manual dosing process, or an automated one. This is instrument dependent, for James Heal the process is automated. Some instruments that are manual will require you to filter your water, and fill a beaker and then pour it directly into the testing area, but others may fill up automatically.

Insert the specimen
Roll over the surface of the water to ensure no air bubbles are trapped.
It is important that when you have inserted your specimen and set your water level, that the specimen is not bulging. If the specimen is bulging, you are already starting at an uncontrolled level, and the results of the test can be affected.

Clamp the specimen
To clamp, lower the pneumatic head. This creates a watertight seal around the specimen.
On most instruments, the test head will not clamp unless the safety guard is lowered and the splash guard inserted. This safety feature ensures that fingers cannot be trapped in the process.

Start the test
Monitor activity of the test head area when you have started the test. As the pressure increases the specimen will distend, but this doesn’t mean that you will be seeing results straight away. The test is gauged over how long it takes before water is formed through the top side of the fabric, and how much pressure is used to get to this point.

Record activity
If/when water droplets begin to form, record each drop immediately. This reading will be saved in to the results page, and on HydroView this is alongside a reference image. When 3 drops been identified and you’re happy that they have fully formed you can manually stop the test.
The test is to be repeated 5 times, so you will need at least 5 specimens. The mean of these 5 tests is calculated to form the final result for the test.

When is a drop 'a drop'?
Determining when a drop is 'a drop’ can at times be precarious. The test needs to be performed with attentiveness, as hydrostatic head testing is predominantly observed with the naked eye and drops can form within seconds of a glance away.
The standard (EN ISO 811) clearly documents that a drop is any detection of water on the face of the specimen that grows. On occasion, small drops that do not grow in size may appear throughout the test, but these should not be counted. These do not give us an accurate representation of penetration, as some fabrics can ‘sweat’, and some fabrics may have small imperfections, though for this test these are not a consideration.
Note whether the penetration occurs at the edge of the specimen, if so, the standard states to ‘reject as unsatisfactory’ any individual test in which this occurs. Seeing these smaller drops nearer the edge of your specimen could mean that there are more frequent small imperfections in the fabric. Test further specimens until reproducible results are obtained.
All drops shown within these guidelines are to be recorded as part of the data, though for the majority of tests and specimens, this will not be difficult to gauge.
Interpreting the results
When the drops are recorded for each of the 5 tests, the data includes the time in which it took for the drop to form and at what pressure, specified as either centimetres or millibars of water.
To interpret the results, the mean needs to be calculated from the 5 tests, which forms the final hydrostatic head value for this test. When reporting the data, it is important to provide the data from each test, as well as the final hydrostatic head value, as this gives a good indication of how evenly the specimen performs from test to test.
NOTE: When comparing sets of data and different specimens, only specimens that have been tested at the same pressures and temperatures can be compared to each other.
Final considerations
As with nearly all types of testing, that the relative humidity (RH) of the laboratory environment in which the specimens are tested, is an important consideration. Particularly with this type of testing will the RH be a contributing factor to the consistency of the results, but there are also other conditions to look out for in the lab's atmosphere.
Other considerations include:
- Trapped air in between the specimen and the water - when mounting your specimens, ensure there are no pockets of air trapped between the specimen and the water level.
This is a common issue that technicians find, as it can happen quite easily. Ensure that you have a levelled surface of water, that comes right to the top of the testing area to ensure the water sits as a totally flat surface. We would suggest rolling the specimen over from one side to the other, as opposed to bringing the full piece down vertically.
- Water tight seal - the head relies on a completely tight seal. Often these seals will include a rubber ring which aides the sealing.
Should there be imperfections under the seal, water and water pressure could be lost, and you will not be able to perform a test correctly, if any test at all.

Contact us today
Want to learn more? Get support from the textiles testing experts and talk to us about your test requirements.


